
Salespersons
When processing sales documents, such as invoices, credit notes, and quotes, as well as purchase documents, such as purchases, supplier returns, and orders, you can select the relevant salesperson. When printing various reports, you can view salespersons.
|
|
You can add salespersons in Setup → Salesperson (Setup ribbon), and they will automatically be listed in the Salespersons groups. You can also edit the salespersons in the groups as needed. |

To add / edit /delete salespersons:
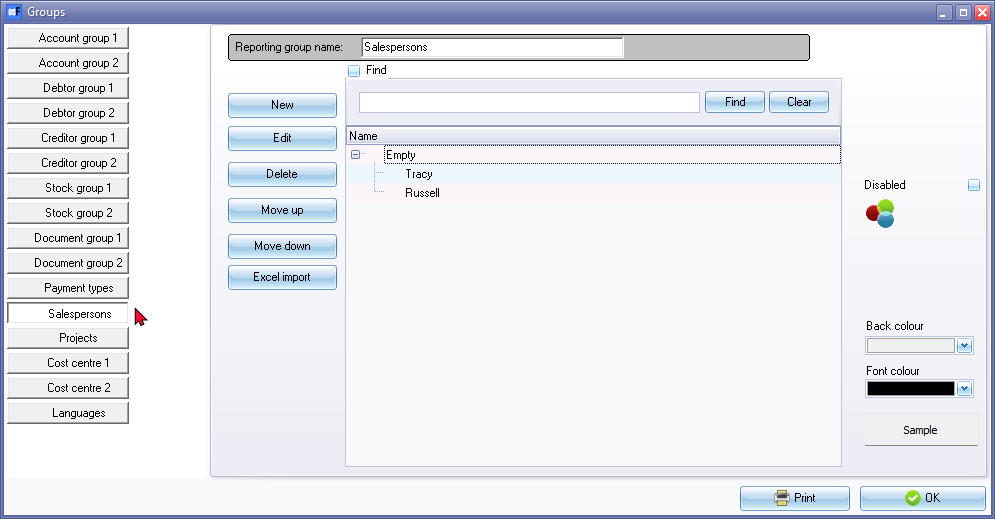
- On the Setup ribbon, select Setup → Groups. The "Groups (Account group 1)" default screen will be displayed.
- Select "Salespersons".
|
|
You may set different sequences for each reporting group in which the groups and accounts are listed on reports, etc. This is done by selecting the groups on the list and use the Move up or Move down buttons. |
- If you wish to rename the Reporting group name - Salespersons, over-type the description with your new description. This will change the description of the button for Salespersons.
- To add a new Group to the root directory or list, select the "REPORTING GROUP ROOT" on the list and click on the New button.
- Enter the name of your next salesperson and click on "REPORTING GROUP ROOT" on the list.
- Repeat the process until you have entered all the Salespersons, etc.
- Click on the OK button to save your changes and close (exit) this screen.
|
|
You may click on the Print button to print a list of your salespersons. |