
Translate Multi-language groups
The names or descriptions for Groups, as entered / edited in the Setup → Groups menu for all the Groups tabs, are by default displayed on screens, lookups, documents, reports, etc.
|
|
To use multi-language Groups, Language Groups need to be created / added in Setup → Groups - Languages tab. |

The following groups need to be translated, where necessary:
- Account group 1
- Account group 2
- Debtor group 1
- Debtor group 2
- Creditor group 1
- Creditor group 2
- Stock group 1
- Stock group 2
- Document group 1
- Document group 2
- Payment types
- Salesperson
- Projects
- Cost centre 1
- Cost centre 2
To translate groups:
- Go to Setup → Groups menu.
- Click on the Account Group 1 tab.
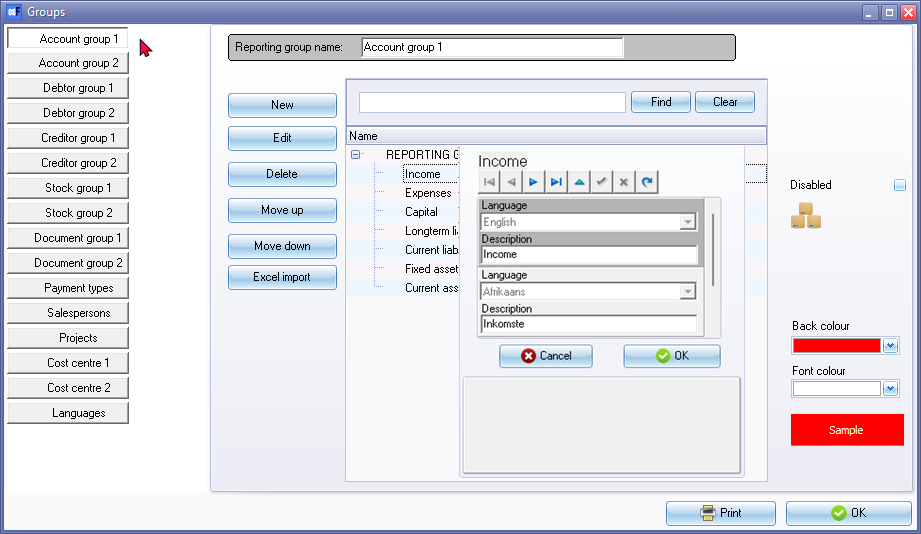
- Select a Group (e.g. Income, etc.) on the list and right-click to select the Languages on the context menu.
- Enter the Name and Description for the Account group 1 item.
- Click on the OK button.
- Repeat the process to add all required items on Account group 1.
- Repeat the process for all other Groups (e.g. Account group 2, etc.) where required.
- Click on the OK button to save your changes and to close the "Groups" screen.
After translation
After translations added, the group names will be displayed in the Language set for the logged in user.
Logged in as English user

To print the groups, click on the Print button.
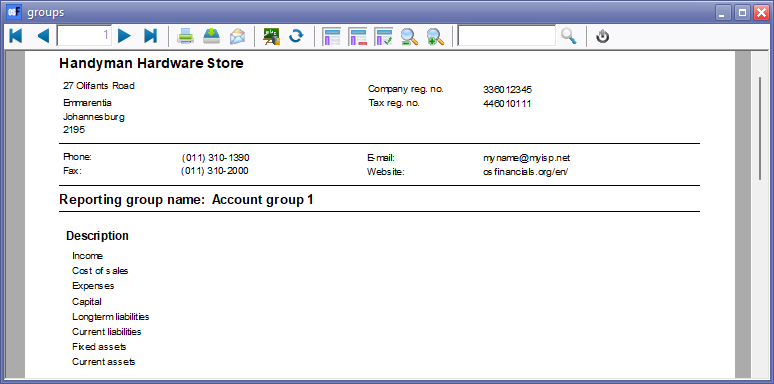
Logged in as Afrikaans user
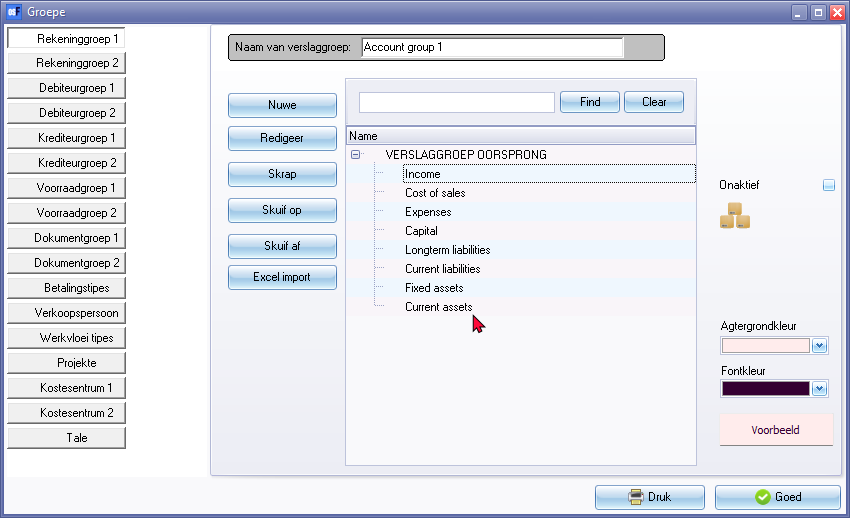
The group items will be listed in the default language (as in this example, English).
To print a list of the groups, the groups, click on the Print button. The translated groups will be listed.
