




SQL Script Editor
Writing SQL Script
-
On the top half of the SQL Browser screen, the following SQL script is displayed:
Select * FROM followed by the name of the selected (active / opened) table. In this example,
Select * FROM TRANSACT represents the TRANSACT (Transaction) table.
-
After the name of the table, leave a space, type where and leave a space and type the name of the column, (e.g. to list only those transactions for a specific date, type DDATE).
-
Leave a space and type an Operator symbol (e.g. to list all transactions equal to the value that needs to be entered, type =)
-
Leave a space and type a valid value (e.g. for the date, type '2009/03/16') This value must start and end with an apostrophe.
-
Click on the Run icon (or press the Enter key on your keyboard) to run the script.
The following few examples based on the TRANSACT table:
-
Filter / Search By
Examples
Date
Select * FROM TRANSACT where DDATE='2009/03/16'
Reference Number
Select * FROM TRANSACT where SREFERENCE='JNL1'
Document Number
Select * FROM TRANSACT where SREFERENCE='IN000003'
Amount
Select * FROM TRANSACT where FAMOUNT='1710'
Font Editor
You may also customise the font in which the query data is to be displayed on the SQL Script Editor.
To Edit the Font:
-
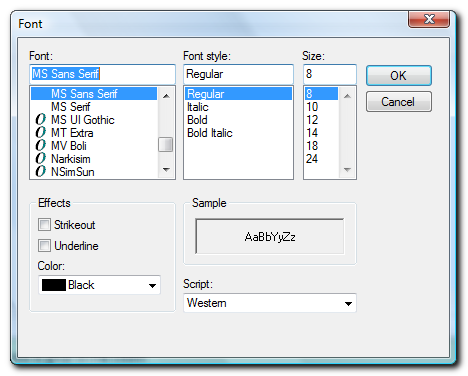
Right-click on the SQL Script Editor section of this screen and select the Editor Font … option. Alternatively, click on the Options → Editor Font menu.
-
Change the font, font style, size, effects and colour as necessary.
-
Click on the OK button. The text in the SQL Script Editor will be displayed in the selected font.
Records
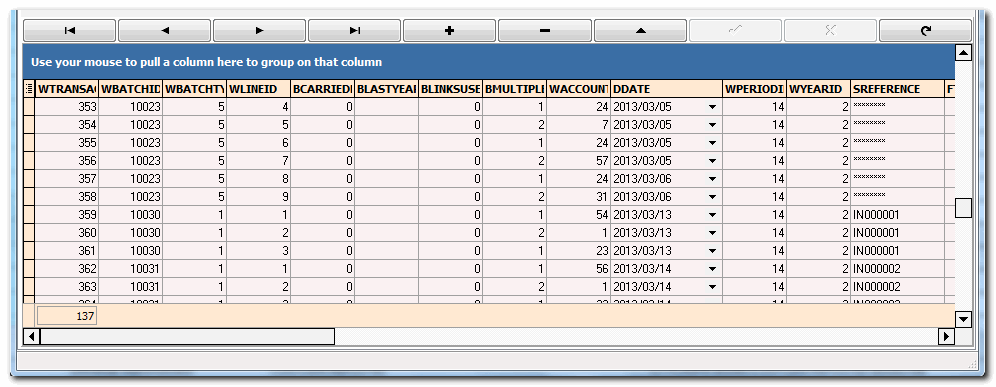
The data for the selected table will be loaded in the bottom half of the TCASH Browser screen.
If you right-click on the records (table data) the following context menu is displayed:
Buttons to Manage Records
The following buttons may be used to navigate and manage the records:
 - First - Go to the first record.
 - Previous - Go to the previous record.


 - Next - Go to the next record.

 - Last - Go to the last record.
 - Add - Add a new record.
 - Delete - Delete a record. Once you click on this button, the following confirmation screen is displayed:

 |
Make absolutely sure that the correct record before you click on the OK button. If it is not the correct record, click on the No button and select the correct record. |
 - Action - This will activate the Save or Delete buttons.
 - Save - Save the changes to the record.
 - Cancel - Cancel changes to the record.
 - Undo - Undo the latest changes.

The Data Records Context menu
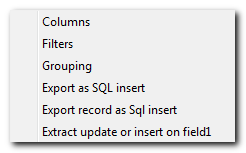 |
Columns – Configure (Show / hide) columns. Filters – Apply filters. Grouping – Apply grouping to the data. Export as SQL insert – This will run and export the entire selected table to SQL script. Export record as SQL insert – This will run and export the selected record to SQL script. Extract update or insert on field1– This will extract the update or insert SQL script. |
Show / hide Columns
The SQLBrowser displays all the columns for the selected table by default. You may filter (hide) or show only those columns you need to see.
To configure columns:
-
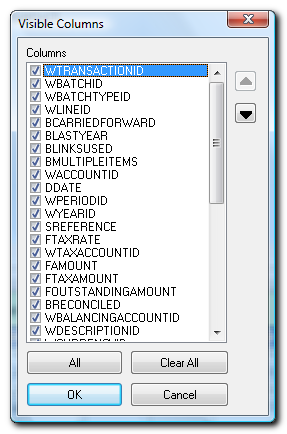
The SQL Browser displays all the columns for the selected table by default. Should you wish to hide any of these columns, you may click on the Options → Columns menu of the SQL Browser.
-
Select the following options, if necessary:
-
Show / Hide Columns – You may de-select (remove the tick) the columns which you do not wish to view by simply removing the tick from the selected column.

You may click on the All button to select all columns.
To clear all remove all the columns, click on the Clear button. You may then select place a tick only in those columns to be displayed in the SQL Bowser.
To select (tick) or de-select (remove the tick), you may use the Spacebar and use the Down and or Up keys to select a column.
-
Sequence – Should you wish to change the sequence in which the columns are displayed, you may click on the or buttons.
-
-
Once your selection is finished click on the OK button to apply these changes to the data in the SQL Browser.
|
|
Move Columns using the Mouse: You may also click on a column and drag it to the right (or to the left) to change the sequence in which you prefer the columns to be displayed. Remove Columns using the Mouse: If you wish to delete or remove a column, simply click on the column and drag it down and leave the mouse button. |
Sequence of Data in Rows
All the data is by default displayed ascending; from the smallest to the highest value (e.g. a-z or 0-9) according to the record number or record ID (e.g. Accounts.DB table it would be the AccountID, in the TRANSACT table, it would be the TRANSACTIONID, etc.)
To change the sort order from ascending (e.g. a-z or 0-9) to descending (e.g. z-a or 9-0) select a column and click on it. If you click on it again it will change back to ascending sequence.
Filter Options in Column Headings
While viewing and analysing the data you may sort and filter the data, in each column of the active or loaded table. To do this, select the column and click on the drop-down arrow. A list displaying the data as well as an All option and a customise option in the selected column will be displayed.
For example, the Reference column (i.e. SREFERENCE) of the Transaction table (i.e. TRANSACT) will display as follows: 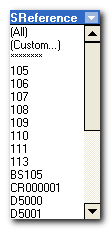
The filter for this column (as per example) will list all reference numbers as entered in batches (journals) example, the reference for balancing entries (i,e, 8 asterisks ********) Reference column (i.e. SReference) of the Transaction Database table (i.e. TransAct.DB).
Custom Filter
You have the following options to sort or filter the data:
-
Select a specific entry from the list - only those entries which match the selection in the table, will be listed, e.g. with the same reference number.
-
All - Select to display all the entries in the selected table.
-
Custom - This will launch a screen on which you may set further criteria to filter the data.
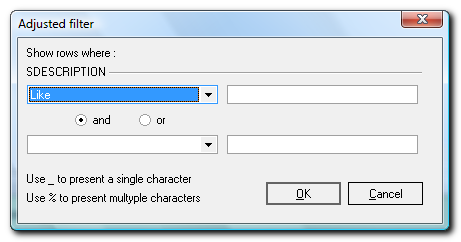
-
Equal to - list or display all values which is the same as the specified value.
-
Not equal to - list or display all values which is not the same as the specified value.
-
Less than - list or display all values smaller than the specified value.
-
Less than or equal to - list or display all values smaller or equal to the specified value.
-
Greater than - list or display all values greater than the specified value.
-
Greater than or equal to - list or display all values greater or equal to the specified value.
-
Like - list all values in the table similar to the specified value.
-
Not like - list all values in the table not similar to the specified value.
-
Is null - excludes any value entered, will not be listed or displayed.
-
Is not null - is not zero - any value which is not equal to zero will be listed or displayed.
-
Date Filter
If you are working in a column of which the data is dates, the following date selector screen will be displayed: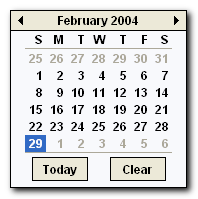
You may then select a specific date to search or filter the data in the table.