")
")

Reportman
Videos Reportman
1 Create a customer list
2 Group and add sum expression
3 Reportman Datasets and Parameters
4 Reportman parameters detail
5 Reportman structure
6 Report printers
1 Open Reportman
osFinancials used a very powerful report generator for both the ( financial as - stock etc. ) as well as for reporting the bill ( etc. ) layouts .
default, with various layouts supplied with the program.
In the rest of the explanation is the word we mean layout used as an invoice or purchase variant of a layout .
it is highly recommended to always make a copy of the report before this edit it.
allows you always fall back on an original layout if things go wrong .
A second tip is , rename all your layouts layouts that are not overwritten when possible reinstallation by the standard supplied with layouts .
You open Reportman ( Report Designer) via the menu choice Tools => Report design . 
And the Home screen, you can see the various layouts displayed .

the purchase invoice and layout are located in the"Documents/Documents".
the other reports that are used in osF are located in other directories .
2 Open example invoice
To get how the layout looks like when using a visual example , we can use a sample invoice .
This allows us to experiment without the billing information changed.
You click here for the"Select Test document iD"button .
And a list of existing documents .
Do not have documents , you can create an offer .
This is after testing be removed ( or modified for your first real quote ) without affecting the financial or stock records . 
in this example, double-click on the line with invoice No FA000001 , and then you come back in the overview .
the field below the button now displays the internal ID back of this document , and is also irrelevant .
3 Copy invoice for your own use
In this example we will use a background image to simulate ."preprinted"
This prevents expensive printing, and your bill still a proffesional look.
And start as indicated its previous opinion with copying the example to a billing invoice layout for your own use .
we start by clicking the name RMFactuur , this is the default supplied with invoice .
then we click on the"Copy"button , and the copy is made . 
the second step is to rename the copy to a convenient name for the user .
we do this by double clicking on its name and to place its own text. 
for safety consideration we click on the"Copy"button to copy the original make , if something goes wrong .
This step is not rendered .
4 Open invoice layout
We open the sample invoice in the edit screen by double- clicking the layout name. 
If you have already specified a logo to your business data ( CTRL + F5 ) you will see it in the upper left corner of the invoice layout .
you can then format adjust by using by clicking on one of the corners to resize the block and dragging .
5 Insert background image
To set a background image, you have two options .
Either the company selected the back ground picture or do we go this next to the logo which we opgegegevn the business data add to the bill.
the advantage is that your logo always on call via a simple command for use in Reportman .
We are going so add an external image as the background for the invoice layout .
Here for we need to remove by clicking on it the first field for the logo ( the four corners are now silver , indicating that the object is selected ) .
To delete the object, use the CTRL + DEL key or mouse click on the cross next to the inzoem level ( given as 100 % again ) .
There is now space to show . briefkop as the background image 
For adding this picture, click on the top bar called"Page header".
you will now see on the left column to see which this part of the layout uses the settings. 
First we set the value of the field"Resolution ( dpi )"300 ( in accordance with the resolution of the image to use ) .
And the value of the"Back.Style"field on print , allows you to get when you print the image on the paper will also be seen .
Sit the value to"Design"you only get to see in the design .
the picture This is again useful if you print on preprinted paper , because you use the image as wallpaper template can .
Now ill be designated by the image in the"Image"button .
the windows Explorer opens and you can go to the place where the image is stored . 
By changing the file type field, you can also use other formats outside the bitmap format.
If you click the image , you will see a display on the right.
by clicking openente now we import the image in the layout and thus never touch the image lost , because it is now included in the layout .
After importing the image we see all"appear"through our work surface over .
by"Resolution ( dpi )"field set to a value other resize the image proportionally .
However, please note that you therefore it adjusts the quality , because the original values of the image thus adjusted.
the ideal is to use the same reolutie as the image is .
by now the icon with the magnifying glass ( 3rd from left ) clicking , we can now give a preview of how the bill looks like there are now . 
Close the preview with the cross .
Close the editor with the cross
you will now see whether the changes to save , of course, we now choose yes . 
And we close the layout list of the cross .
6 New layout as standard invoice make
Now we have a new invoice layout , we want to also use this as default if we print an invoice .
This can be set via the menu option"Settings => Administration => Documents". 
We are now in the screen where we can enter .  < br standard document data/>
In the"Print Type"field we choose the just created invoice layout . 

And we have set a new standard invoice layout . after clicking the"OK"button
In the same screen, you can Incidentally=accordance with the"Next invoice Number"the next invoice number field indicate .
And in the"print Type 2"can indicate a second layout , think eg to delivery note .
This will bring printed after the printing of the invoice immediately packing slip .
7 Payment term printing based on the value at the debtor
This explanation is based on the original"RMFactuur.rep"layout .
The field names can be different /> your layout .
You can specify a payment by the debtor in the field"payment condition"
This payment condition we can use it for example to be able to .
If you ards for everyone the same period , the payment rule an invoice debtor otherwise you obviously easier to use a fixed text .
In field condition payment you can eg use the following values :
This valueThis value
| 1 and higher | The whole numbers indicate the number of days |
| 0 | can eg be used for advance payment |
| -1 | can eg be used for collection |
| -2 etc. | Other values you can assign as you wish |
Now that we have established the payment term we apply it to the invoice layout .
Open check your invoice layout .
We start by aanpasen the value"Force print"which footer going to be. rule printed 
Click ier for are now visible .
if necessary, turn the value of the"Force print"field with the left mouse button on the toolbar"page footer"at the bottom of the big screen .
the settings in this section of the report the left column to"True".
then we insert the field that is going to be .
printed the payment rule we do this in the toolbar by clicking on the image (expression ) with the letters ab it .. 
Now we can draw a right angle in the page footer by pressing of the new field .
with the left mouse button the top left not let you go. mouse button
And then by dragging the mouse , we can draw as big as we think we need for the lyrics . 
If we let go of the mouse is a rectangle with the text 2 +2 in the field.
This text we should replace the text .
this we click in the left column on the"expression"tab, and then click the button top right next to the value of the field ( 2 +2 ) . 
If we do this , a popup screen with the value as the field now . 
the text 2 +2 we now replace the code that we go our payment line printing .
this we copy the text below, including the quotation marks .
IIF ( ACCOUNTINFO.WDUEDAYS < 0 ,"This bill is cashed by direct debit . Our registration number at the Chamber of Commerce is"+ + ADMINISTRATIEGEGEVENS.KVKNUMMER and our VAT number is ' ADMINISTRATIEGEGEVENS.BTWNUMMER + + ' . '
IIF ( ACCOUNTINFO.WDUEDAYS=0 ,"This bill is met through a prepay . our registration number at the Chamber of Commerce is"+ + ADMINISTRATIEGEGEVENS.KVKNUMMER and our VAT song is ' ADMINISTRATIEGEGEVENS.BTWNUMMER + + ' . '
"This bill has a payment of"+ STR ( ACCOUNTINFO.WDUEDAYS ) + ' days , and must therefore by"+ STR ( + DOCUMENTKOP.DDATE ACCOUNTINFO.WDUEDAYS ) + ' to be paid. our registration number at the Chamber of Commerce is"+ + ADMINISTRATIEGEGEVENS.KVKNUMMER and our VAT number is ' + ADMINISTRATIEGEGEVENS.BTWNUMMER + ' . ' ) )
and paste it in instead of the 2 +2 text . 
To the result see we click on the"Show Result"button . 
Click the"OK"button and press the"Ok"button again to save this expression.
8 Using expressions
When using expressions are some very useful tips :
* Plain text must be enclosed in quotation marks :"This is plain text"
* Variables which are correctly extracted from the database of osF .
* Variable and not plain text combine :
... expiration date :"+ DOCUMENTKOP.DUEDATE
The plus sign is merging
* use on multiple lines of text .
"This is the end of line 1 ' + # 10 + # 13 +
"This is the beginning of line 2 '
This will both lines under each print
. * the use of functions (see bottom left of the screen expression )
LOWER CASE ("This Is My Example text ' ) , the entire text eg with lowercase print .
UPPERCASE other hand to correct the entire text capitalized
Click once on a function and you will see the description for the explanation of the use
* Working with conditions : . .
IIF ( value> 0 , 'Where' , ' Not where ' )
This means if the ' value ' is greater than 0 then print the text true, otherwise the text"Not true."
9 search fields
Sometimes you want to add an extra field in the layout, but you do not know what the variable is
Here is the out ; . . eg how to find
In the edit screen layout that allows you to self tab"data"button and you get a list of available groups and fields of these groups .
to see the fields , click on the"plus sign"for the group , or double-click the group. 
To use a field in your layout , click the field and drag it to the desired location on the layout and let the pitch go.
Obviously, not all fields immediately clear what they mean , now you can of course drag fields to the layout and preview , but there is also another way .
Click on the"toolbox". 
In appeared popup click on the group to which you want the field, in the example the VAT group . 
Pushing the button"Show data"button , we get to see the data available , incl the field name . 
With the arrow keys , you can cycle through the available data click around and you'll see the various tax accounts in this example .
now find the desired field and close the screen with the"Cancel"button .
in the layout , you can now look up the field found in the list of fields and drag them to the layout to .
Because there are hundreds of fields in osF , there is often a selection of the most commonly used fields .
And so it can happen that a field missing from the list
If you have SQL knowledge you can customize it in the next screen . 
If you have no SQL knowledge , is it more difficult , but you can always make a call using our forum .
Pastes you taking the text from the specified field in your posting , and clearly indicate you want with it .
Perhaps there is someone who can give you .
the answer which field
Setting
10 Printer
To associate a report a printer, go to file-> page setup tab print setup in the main menu

In the appeared window , go to the"Print setup". tab
In this screen , go to the"Select Printer". 
And here choose"Printer User 1", this is the default printer eg A4 printer . 
Then click the"Configure printer"button. 
selected there too"User printer 1".
and then choose to"Select printer"your A4 printer .
and make sure the"Text only driver"field is empty , and the checkmark"Umm"turned off . 
you can connect a printer for all printers in the last screen to"User printer".
When using osF you as to any computer on that computer link available printers on multiple computers the"User printer".
And with the reports automatically print from any computer on the correct printer .
11 Seller printing
To print the seller on your documents, you can do the following changes to your current bill.
Do you always make a backup of the layout , so you can always drop it if something goes wrong back on.
you open the invoice , or other document.
click the tool button .
that you get to the"data sets", which are sets of associated data , eg data of your company or the details of your invoice or the product lines of your bill.
In the appeared window click on the text"Document Header"( as an example here is the selected VAT ) .
in the right part of the screen is now the SQL command in the corresponding image which retrieves data .
This is always a"select"with which you selected the desired data fields .
a"from"that indicates the correct tables where data is to be retrieved .
And from a"where"to have a limitation of the data to retrieve eg only the data of one customer .
Make sure you do not adjust the existing text if you do not know exactly what you are doing .
we're going so make sure that the vendor name be picked up at the"document header"data .
In the select we give it to the"from"command the name of the field where the name of the salesperson .
the missing here, with you under names displayed or otherwise , then this is also the text "from".
DelName.SDescription axis DelName ,
DelContact.SDescription axis Delco Tact
from
We now set the field for the vendor name there.
What you should take note that all the fields are separated by a","(after the field name ) except the last line for the"from"
If we add a field to the end , then we need to continue to place daarne the new field","after the last field
it will look like this see : .
DelContact.SDescription as Delco Tact ,
SDescription as Seller
from
That was step 1 to step 2 now record the table where the vendor name is .
We will go on looking for the command"where"and we look back to the commands that are there for .
For example :
Messages DelName on ( dochead.WDelname=DelName.WMessageID ) left join
Messages Delco Tact on ( dochead.WDelContact DelContact.WMessageID=)
where
We turn now after the last command in the"where"command the following:
..... left join
Groups salesman on ( dochead.WSalesmanID=salesman.WGroupid )
The whole will look like to see :
Messages DelName on ( dochead.WDelname=DelName . WMessageID ) left join
Messages Delco Tact on ( dochead.WDelContact=DelContact.WMessageID ) left join
Groups salesman on ( dochead.WSalesmanID=salesman.WGroupid )
where
In this case we have the"where"not to easter, because there is only one document per seller .
You can now save the"OK"button on the changes and return to the layout .
There you can drag using the tab"Data"section of the"Document Header"and expand the new field"Seller"to your layout .
If you then properly positioned the field you are ready , and you can close the layout and save it.
12 Order invoice lines
the older layouts could happen that the layout of the order invoice lines in the document are not followed .
This can be solved by"order by docline.WSORTNO"adding the sql for the document line . 
13 Using the product name field in translation tab instead of the default product name.
open the same screen as in step 12
And add a dataset by clicking on the picture window with the green + to 
Give the dataset a name that makes sense , so it can be later easily use them.
the new dataset called"Language"and click ok the"Ok"button . 
After creating we need to do two things :
1 ) the data link set to a master dataset , this is a relationship between a value in the master data set and the details in this dataset .
2 ) thereof specify the sql that the required data is collected .
Fill the dataset as shown below .
For convenience , this is the sql shown : .
Select 1 a, * groups from groups where WGroupTypeid=1004 and
Sdescription=' Dutch ' and ' Dutch '=: Slanguage
union
Select a second , groups . * from groups where WGroupTypeid=1004 and Sdescription='English ' union
Select 3 a, groups . * from groups where WGroupTypeid=1004 and Sdescription=' English ' order by 1 
now we go to the dataset"DOCUMENT CONTROL".
we now associate with the master data set"Language"and we add the specified sql far.
For simplicity here the sql
stock_descriptions.Sdescription ,
left join stock_descriptions on ( docline.WStockid=stock_descriptions.WStockID )
and ( stock_descriptions.Wlanguageid=: WGROUPID or stock_descriptions.Wlanguageid is null)
Note sure that each line ends with a space ! 
Now click the"OK"button to save.
Now use instruction 9 to add the newly added fields in the layout
14 Adjusting the grid
For more detailed to place the fields or graphics you the size of the grid to fit .
The grid is the distance between the blue dots in the layout designer .
defaults to a coarse classification, but is adaptable.
click on the menu option"Display => Grid". 
In the pop up appears which allows you to adjust the value .
As indicated below is , it is much finer grid drawn , which can be there. precise fields placed 
15 Report Export
You can also export a report if you are in the display, there for /> click on the icon next to the printer .
You can now select the desired file format . 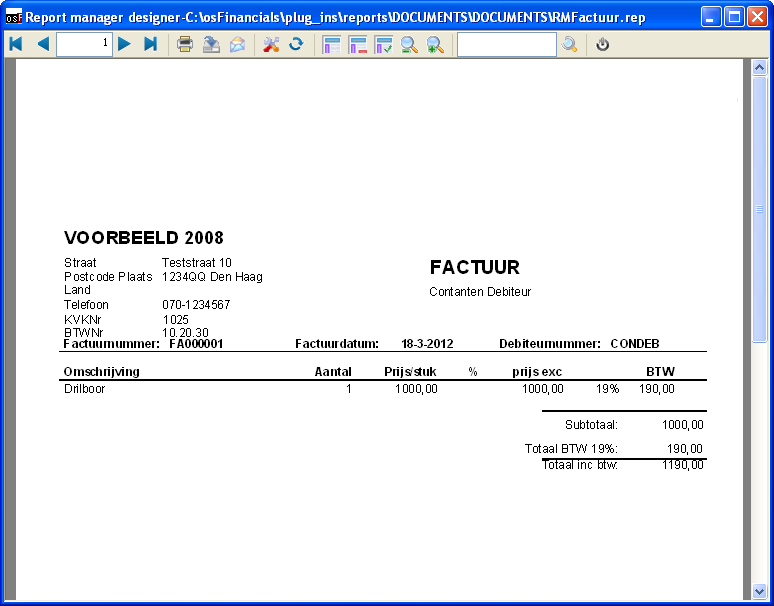
16 After changes in the report only one product line visable
If you only see the product line after wijzign a layout , it will be probably caused because something has changed accidentally .
The solution is : .
you see top left in a window with two tabs:
2nd 1st Structure Data
This is the first tab : . structure
Click the name SubReport -0
Here, nothing behind it (which is the control for this error )
in this window you see two settings are :
Main data set and P.Only data avail
It's Main Dataset
Select the option in this list : . ."Document Control"( or a translation here )
look at the preview function, or you can see all invoice lines again.
17 Adding a currency symbol
Select the field you want to display
And paste it in the"Display format"field an amount this text : . € # # , # # # , # # # , # # 0.00 
18 show a report , even if there is no data to display
Weather there is a default setting in the reports which ensures that no print is displayed, if no information/data is to be displayed .
Do you want eg to test/develop a layout still can see something you value p.Only data avail. set to False .
Click there for first time"SubReport -0"
19 In a report, use the plugin Dynareg Delivery Date
Use the basic instruction of Section 9: Search for fields
In the dataset now choose "DOCUMENT CONTROL" because the delivery date is laid per document line
We need to use "delivery date 1.. "do
Paste bad one addition." docline.DDELIVERDATE "behind" tax.FRate "(do not forget the semicolon at the beginning) so it will look like this:
Select messages.sdescription | | coalesce (messages.sExtradescription,'') Description, WDOCLINEID, WDOCID, docline.WSTOCKID, WLINETYPEID, docline.WDESCRIPTIONID, FQTYORDERED, FQTYSHIPPED, FSELLINGPRICE, FITEMDISCOUNT, docline.WTAXID, FEXCLUSIVEAMT, FINCLUSIVEAMT , FTAXAMOUNT, docline.DSYSDATE, docline.SUNIT, stock.SSTOCKCODE, stock.FNettoWeight, docline.WPROFILEID, WSERIALNOID, tax.FRate, docline.DDELIVERDATE
You can now press the "OK" button to save the changes and return to the layout.
There you back using the tab "Data" section of "Document Control" expand and new field "DOCUMENTREGEL.DDELIVERYDATE" drag to your layout.
If you then properly positioned the field you are ready, and you can close the layout and save
If you also have the other date fields are the corresponding codes:.
Date 2: "docline.DDELIVERDATE2"
Date 3: "docline.DEXTRADATE1"
Date 4: "docline.DEXTRADATE2"